 Send
Primi passi (Master)First steps (Master)
Se il repertorio è vuoto, la home del Master mostra due azioni, una sotto l’altra. Servono a provare l’app prima di caricare i brani veri.
If the library is empty, the Master home shows two actions, one under the other. They let you try the app before you load your real songs.
- Prova con brani di esempio. Aggiunge qualche titolo di prova al repertorio e parte il tutorial. Ti fa mettere un brano in PLAYLIST con +, riordinarlo tenendolo premuto, toglierlo con − e scegliere il brano in scena.
- Aggiungi brano. Salta gli esempi e inserisce subito un titolo tuo. La procedura chiede il nome, poi la cartella dei PDF, poi la conferma dello spartito.
- Alla fine del tutorial scegli «Tieni i brani di prova» oppure «Rimuovi i brani di prova». I brani tuoi, se ne hai già aggiunti, restano.
- Try with sample songs. Adds a few demo titles to the library and starts the tutorial. It has you put a song in PLAYLIST with +, reorder it by holding it, remove it with − and pick the song on stage.
- Add song. Skips the demos and enters a title of yours straight away. The setup asks for the name, then the PDF folder, then confirmation of the chart.
- At the end of the tutorial choose «Keep sample songs» or «Remove sample songs». Songs you already added stay.
Se hai già dei brani, quei due pulsanti non compaiono: i titoli nuovi si aggiungono da Impostazioni › Brani. Il tutorial si rivede da Impostazioni › Guida › Primi passi. Nella stessa schermata trovi anche Collega Master e Monitor, Aggiungi brani e collega i PDF, Usa la playlist dal vivo, Salva, condividi ed esporta, Repertori e Effetti MIDI.
If you already have songs, those two buttons do not appear: new titles are added from Settings › Songs. Replay the tutorial from Settings › Guide › First steps. The same screen also has Connect Master and Monitor, Add songs and link PDFs, Use the playlist live, Save, share and export, Repertoires and MIDI effects.
Primo avvio e scelta ruoloFirst launch and role
All’apertura ogni dispositivo sceglie un ruolo. Il Master tiene i brani e la playlist e decide quale brano è in scena. I Monitor mostrano solo ciò che quel Master invia: titoli, prossimo brano e, se lo hai sbloccato, lo spartito.
On first open every device picks a role. The Master holds the songs and the playlist and decides which song is on stage. Monitors only show what that Master sends: titles, the next song and, if you have unlocked it, the chart.
- Scegli Master su un solo dispositivo, quello di chi conduce la serata. Subito dopo l’app chiede un PIN di 4 cifre. È il lucchetto di quel telefono: brani e scalette restano sul dispositivo.
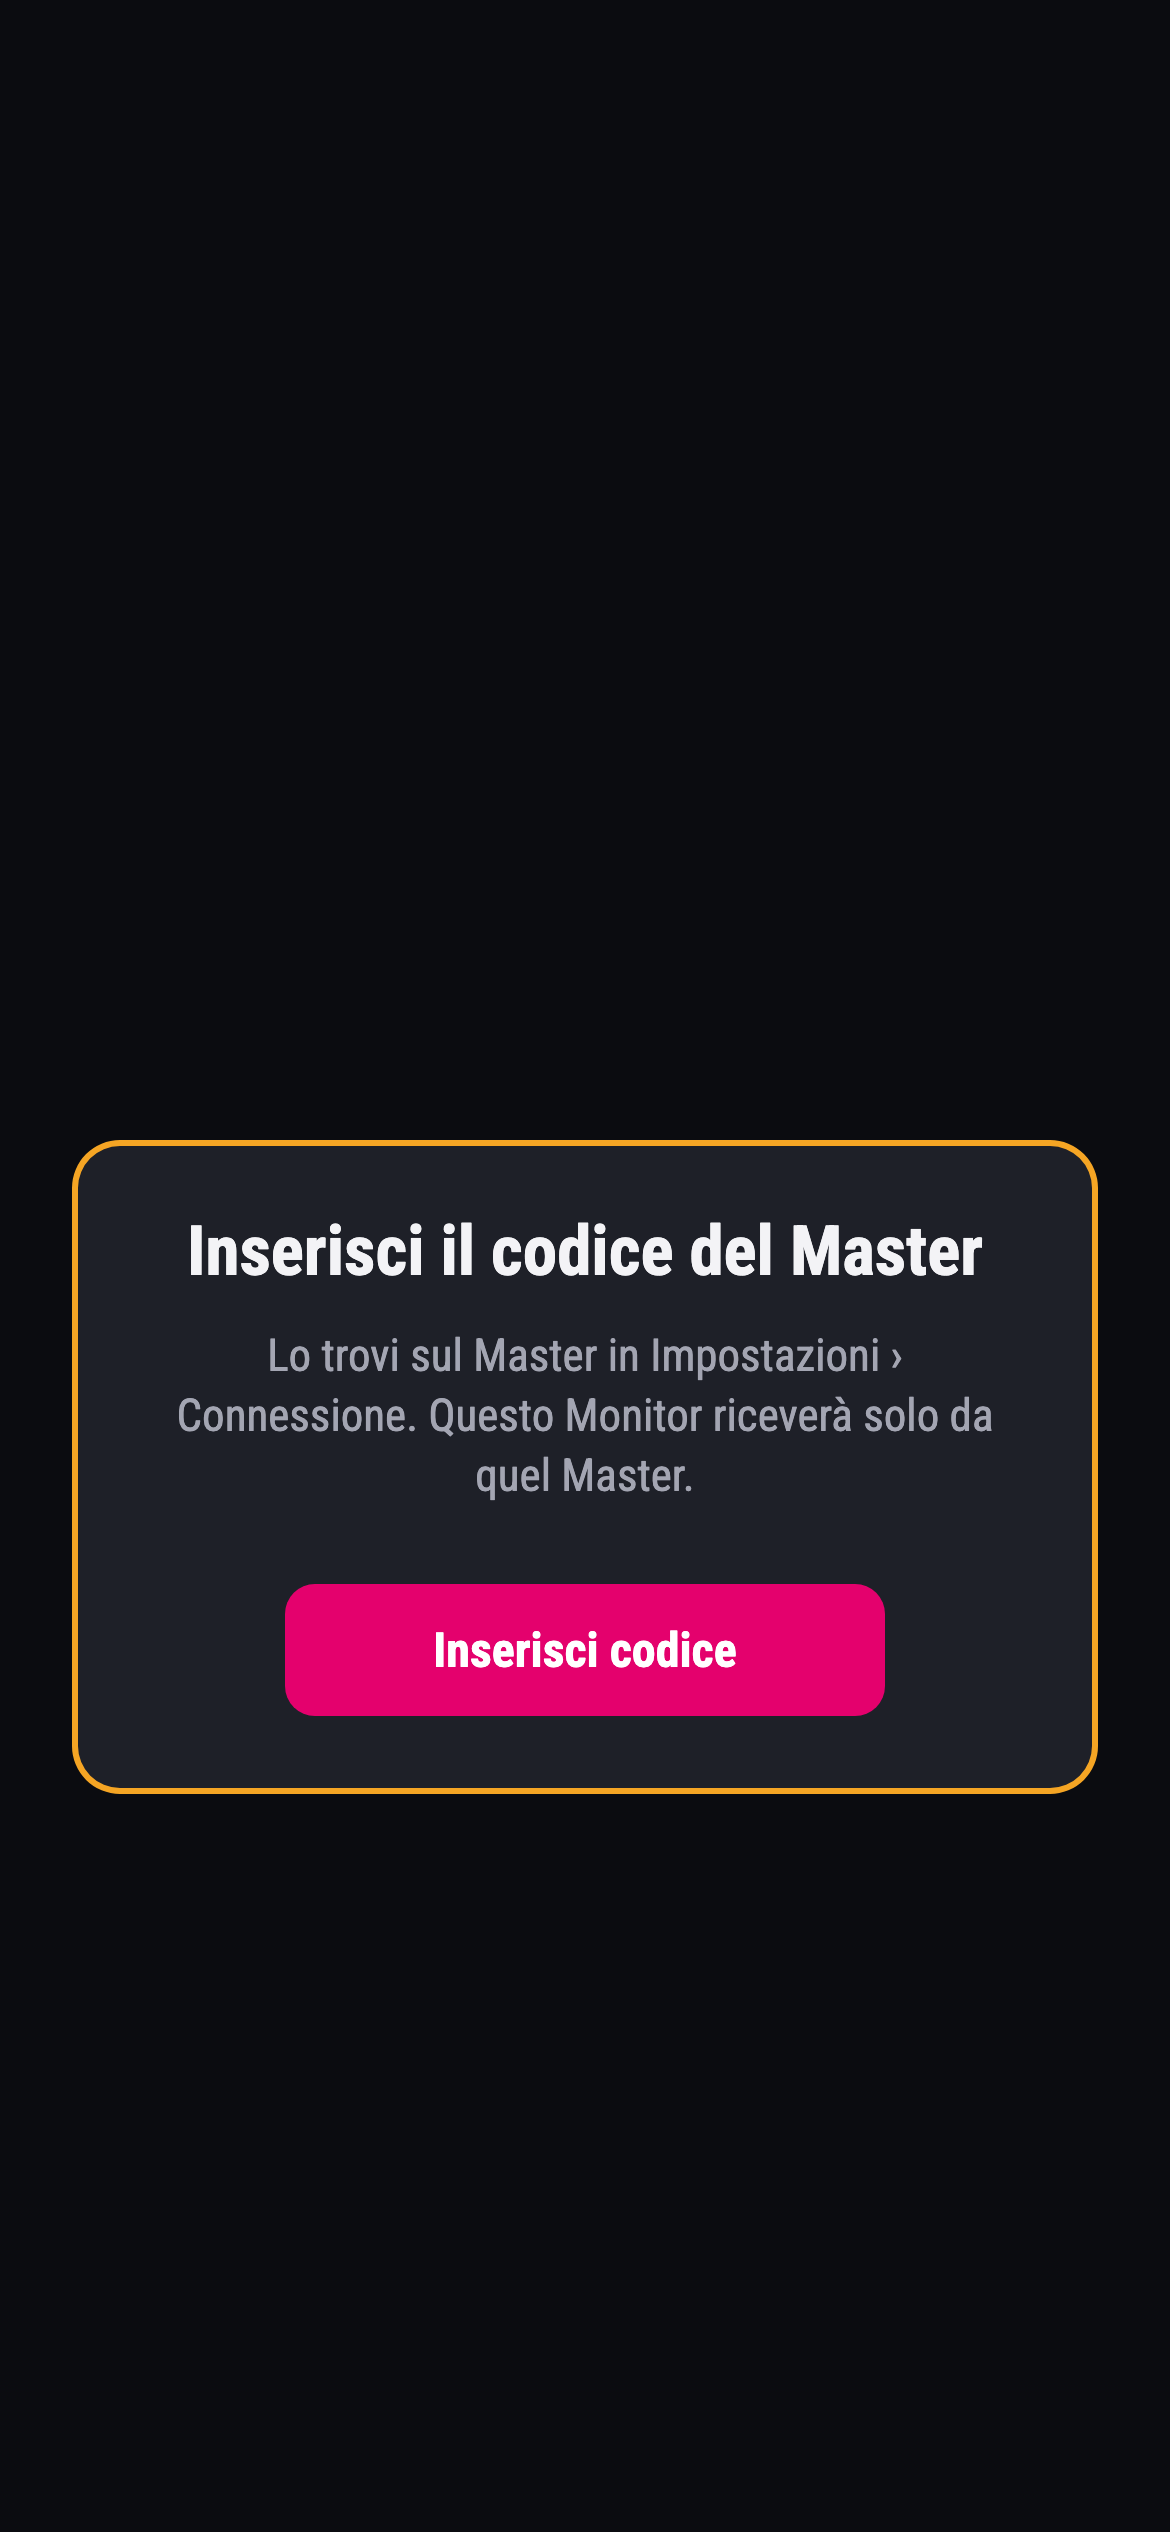
- Scegli Monitor sugli altri. Non c’è PIN: il leggìo parte subito e aspetta il codice del Master.
- Il nome del dispositivo viene dato da solo. Per cambiarlo apri Impostazioni › Connessione › Nome dispositivo: si salva quando esci dal campo e compare «Nome salvato». È il nome che gli altri dispositivi vedono.
- Per cambiare ruolo più tardi apri Impostazioni › Account e tocca Logout. Torni alla scelta Master o Monitor. Brani, scalette e PDF restano sul dispositivo. Se rientri come Master, il PIN viene chiesto di nuovo.
- Choose Master on one device only, the one run by whoever leads the night. Right after that the app asks for a 4-digit PIN. It locks that phone: songs and setlists stay on the device.
- Choose Monitor on the others. There is no PIN: the stand starts at once and waits for the Master’s code.
- The device name is set on its own. To change it open Settings › Connection › Device name: it saves when you leave the field and you see «Name saved». It is the name the other devices see.
- To change role later open Settings › Account and tap Log out. You return to the Master or Monitor choice. Songs, setlists and PDFs stay on the device. If you come back as Master, the PIN is asked again.
Se dimentichi il PIN, sulla schermata di blocco tocca «PIN dimenticato?». Per reimpostarlo servono Face ID, Touch ID o il codice di sblocco del telefono. Se il telefono non ha un blocco schermo, l’app lo dice con «Blocco schermo necessario». I brani restano nell’app. Da dentro, il PIN si cambia in Impostazioni › Account › Cambia PIN Master.
If you forget the PIN, on the lock screen tap «Forgot PIN?». Resetting it needs Face ID, Touch ID or the phone passcode. If the phone has no screen lock, the app says so with «Screen lock required». Songs stay in the app. Once you are in, change the PIN under Settings › Account › Change Master PIN.
Collegare Master e MonitorLink Master and Monitor
L’obiettivo è uno: ogni Monitor riceve solo dal tuo Master. Fai gli stessi passi su tutti i dispositivi, nello stesso ordine. Non serve internet: parlano in locale.
The goal is one thing: every Monitor receives only from your Master. Do the same steps on every device, in the same order. Internet is not required: they talk locally.
- Ruoli. Un dispositivo è Master (con PIN), gli altri sono Monitor. Per rifare la scelta: Impostazioni › Account › Logout.
- Stesso trasporto. Su ciascuno apri Impostazioni › Connessione e scegli la stessa voce. Bluetooth è la scelta comoda quando non condividete una Wi‑Fi. Il Wi‑Fi locale richiede la stessa rete. Se uno è su Bluetooth e l’altro su Wi‑Fi, il Monitor resta su «Ricerca del Master…».
- Codice sul Master. Sempre in Impostazioni › Connessione, leggi le 6 cifre. Senza quel codice il Monitor non si collega, e riceve solo dal Master di cui ha il codice.
- Codice sul Monitor. Impostazioni › Connessione, scrivi le 6 cifre e tocca Salva.
- Attendi «Abbinato». Da quel momento il Monitor mostra ciò che il Master invia. Se resta su «Ricerca del Master…», vai alla risoluzione problemi in fondo a questa guida.
- Roles. One device is Master (with a PIN), the others are Monitors. To choose again: Settings › Account › Log out.
- Same transport. On each one open Settings › Connection and pick the same row. Bluetooth is the easy choice when you do not share a Wi‑Fi network. Local Wi‑Fi needs the same network. If one is on Bluetooth and the other on Wi‑Fi, the Monitor stays on «Looking for the Master…».
- Code on the Master. Still under Settings › Connection, read the 6 digits. Without that code the Monitor will not connect, and it only receives from the Master whose code it has.
- Code on the Monitor. Settings › Connection, type the 6 digits and tap Save.
- Wait for «Paired». From then on the Monitor shows what the Master sends. If it stays on «Looking for the Master…», go to troubleshooting at the end of this guide.
Una rete ospite di un locale può avere internet e comunque impedire ai telefoni di vedersi. In quel caso passa tutti a Bluetooth e tieni i dispositivi vicini, con l’app in primo piano. Un Master iPhone può servire Monitor Android, e il contrario, con lo stesso codice e lo stesso trasporto.
A venue guest network can have internet and still stop the phones from seeing each other. In that case switch everyone to Bluetooth and keep the devices close, with the app in the foreground. An iPhone Master can serve Android Monitors, and the other way around, with the same code and the same transport.
Abbinamento con codicePairing with code
Il codice a 6 cifre è l’identità del Master. Lo leggi sul Master in Impostazioni › Connessione e lo scrivi su ogni Monitor nella stessa schermata, poi Salva, finché compare «Abbinato».
The 6-digit code is the Master’s identity. Read it on the Master under Settings › Connection and type it on every Monitor on the same screen, then Save, until you see «Paired».
- Genera nuovo codice, sul Master, scollega i Monitor già collegati e li avvisa. Il codice precedente non funziona più: su ogni Monitor inserisci quello nuovo. Se il Monitor resta in ricerca, spesso ha ancora le cifre vecchie.
- Generate new code, on the Master, disconnects Monitors that were already linked and tells them. The previous code no longer works: on each Monitor enter the new one. If the Monitor stays searching, it often still has the old digits.
- «Codice errato» vuol dire che quelle cifre non corrispondono a nessun Master vicino. Sul Monitor tocca Rimuovi (non si collega più finché non inserisci un codice) e riscrivi le 6 cifre. Se hai più Master accesi, controlla di non aver copiato l’altro.
- «Wrong code» means those digits do not match any nearby Master. On the Monitor tap Remove (it will not connect until you enter a code) and type the 6 digits again. If several Masters are on, make sure you did not copy the other one.
- «Il Master ha raggiunto il limite di Monitor». Con il piano gratis il Master accetta un solo Monitor collegato. Per più leggii serve Pro o Full, da Impostazioni › Piano sul Master. Titoli e scaletta sul Monitor restano gratis: il limite è quanti Monitor possono essere collegati insieme.
- «The Master reached its monitor limit». On the free plan the Master accepts one linked Monitor. For more stands you need Pro or Full, from Settings › Plan on the Master. Titles and the setlist on the Monitor stay free: the limit is how many Monitors can be linked at once.
Inviare i braniSend songs
Quando i Monitor sono abbinati, un tocco sul Master cambia il brano su tutti i leggii.
Once the Monitors are paired, one tap on the Master changes the song on every stand.
- Tocca una volta un brano in PLAYLIST oppure in TUTTI I BRANI. Diventa il brano attivo e parte subito.
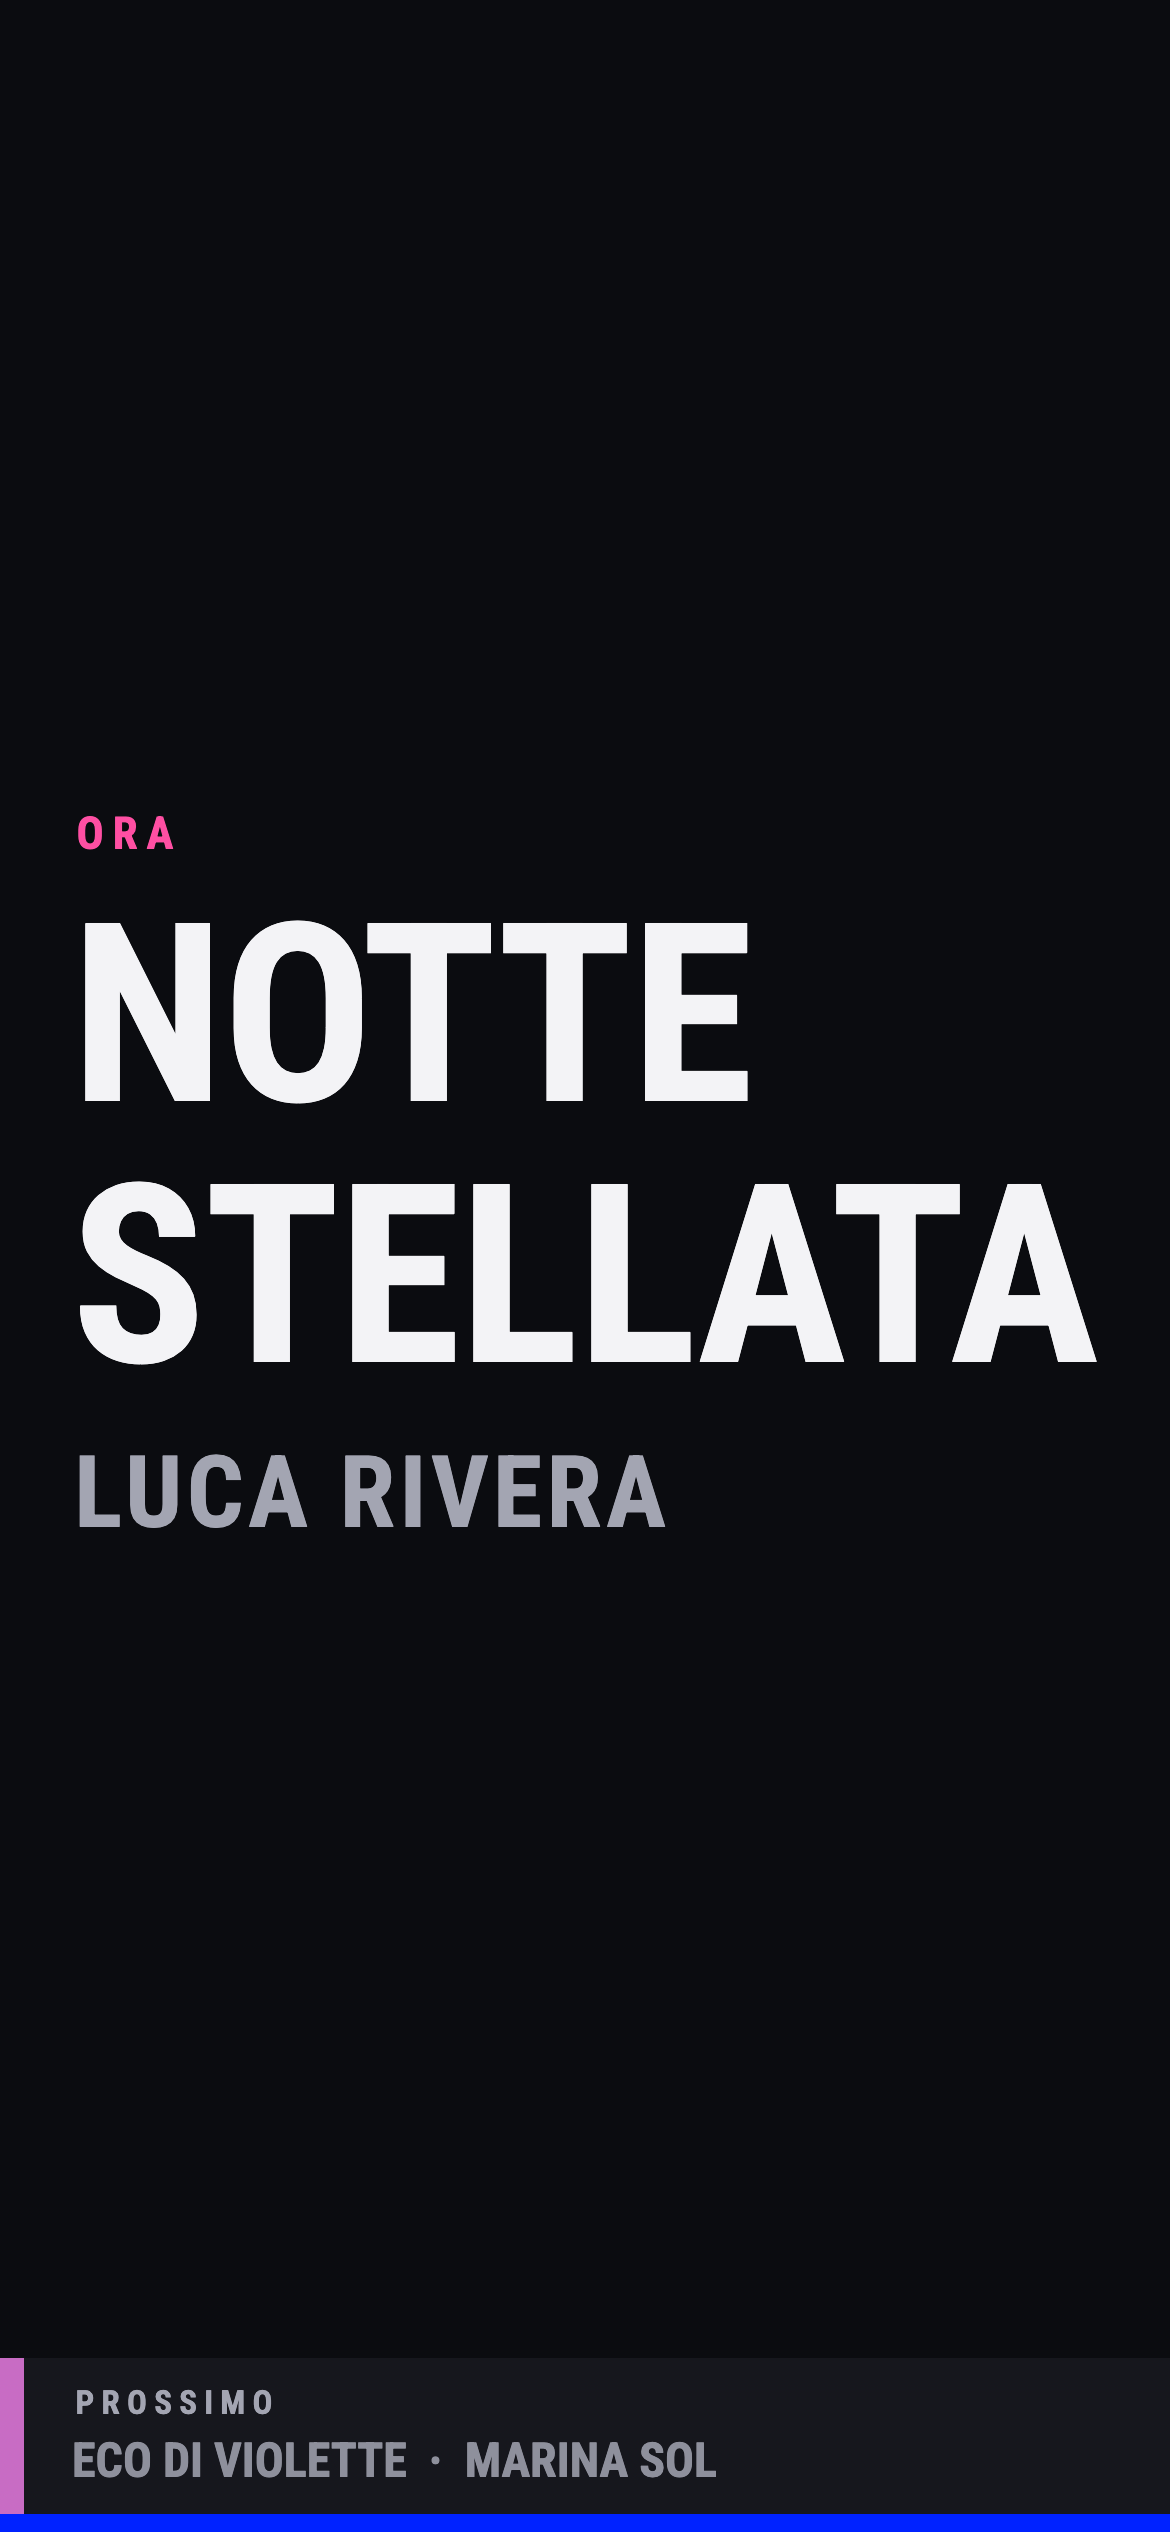
- Sul Monitor compaiono il titolo grande (ORA) e il brano successivo (PROSSIMO). Il contatore in alto sul Master dice quanti leggii sono collegati e riceveranno il prossimo invio.
- Doppio tocco sul Master apre il PDF di quel brano. Il primo dei due tocchi lo ha già inviato ai Monitor. Dentro il PDF, un altro doppio tocco ingrandisce.
- La pillola ORA, accanto a Modifica, mostra il brano in scena. Un tocco ti riporta lì se hai scrollato la lista.
- Tap once on a song in PLAYLIST or in ALL SONGS. It becomes the active song and goes out at once.
- On the Monitor you see the large title (NOW) and the following song (NEXT). The counter at the top of the Master says how many stands are connected and will receive the next send.
- A double tap on the Master opens that song’s PDF. The first of the two taps has already sent it to the Monitors. Inside the PDF, another double tap zooms in.
- The NOW pill, next to Edit, shows the song on stage. One tap takes you back there if you have scrolled the list.
PlaylistPlaylists
La PLAYLIST è l’ordine della serata. TUTTI I BRANI è il repertorio intero. Si modifica solo con Modifica acceso, così un tocco dal vivo non sposta i brani per sbaglio. Se la scaletta è vuota, i + sono già sulla lista.
PLAYLIST is the order for the night. ALL SONGS is the whole repertoire. You edit only while Edit is on, so a tap during the show does not move songs by accident. If the playlist is empty, the + buttons are already on the list.
- Tocca Modifica in alto. Compare la striscia «Stai modificando la playlist» e, accanto ai brani, + e −.
- Aggiungi con + in TUTTI I BRANI. Togli con −. In PLAYLIST tieni premuto un brano e trascinalo per riordinare.
- Svuota, accanto a PLAYLIST, toglie tutti i brani. Puoi annullare subito dall’avviso.
- Fine chiude la modifica: + e − spariscono.
- Tap Edit at the top. The strip «You're editing the playlist» appears and, next to the songs, + and −.
- Add with + under ALL SONGS. Remove with −. In PLAYLIST press and hold a song and drag it to reorder.
- Clear, next to PLAYLIST, removes every song. You can undo at once from the notice.
- Done closes editing: + and − disappear.
Salva, riapri, condividiSave, reopen, share
Apri il menu (⋮), sezione PLAYLIST.
Open the menu (⋮), PLAYLIST section.
- Salva playlist… le dà un nome. Apri playlist salvata… ne riapre una. Con una playlist aperta, il pulsante diventa «Salva «nome»» e aggiorna quella; Salva come nuova… ne fa una copia. Il nome compare accanto a PLAYLIST.
- Save playlist… gives it a name. Open saved playlist… reopens one. With a playlist open, the button becomes «Save «name»» and updates that one; Save as new… makes a copy. The name appears next to PLAYLIST.
- Condividi playlist… la manda a un altro dispositivo SendSong sulla stessa connessione. Esporta in PDF ne fa un file.
- Share playlist… sends it to another SendSong device on the same connection. Export as PDF makes a file.
- Le voci che in quel momento non si possono usare restano grigie, con il motivo scritto sotto.
- Rows you cannot use at that moment stay grey, with the reason written below.
- Crea scaletta… è nel piano Pro. Indichi la serata e SendSong propone un ordine dai brani che hanno energia e momento. Puoi accettare, togliere o spostare prima di usarla.
- Create setlist… is on the Pro plan. You describe the night and SendSong proposes an order from songs that have energy and moment. You can accept, remove or move songs before using it.
Nella sezione VISTA dello stesso menu, Solo brani senza PDF filtra la lista. Una striscia sopra la lista lo ricorda; Mostra tutti i brani toglie il filtro. La playlist in uso può riaprirsi al prossimo avvio del Master.
In the VIEW section of the same menu, Songs without PDF only filters the list. A strip above the list reminds you; Show all songs clears the filter. The playlist in use can reopen the next time the Master starts.
BraniSongs
I brani stanno sul Master, in Impostazioni › Brani. La pagina si chiama «I tuoi brani». Qui imposti titolo, autore, colore, energia, momento e durata: la barra colorata è quella che il Monitor mostra accanto al titolo. Ogni modifica si salva da sola. Non c’è un pulsante Salva.
Songs live on the Master, under Settings › Songs. The page is called «Your songs». Here you set the title, artist, colour, energy, moment and duration: the coloured bar is what the Monitor shows next to the title. Every change is saved on its own. There is no Save button.
- Lista vuota: tocca «Aggiungi il primo brano». La procedura chiede il nome, la cartella dei PDF e la conferma dello spartito. Sul nome c’è anche «Suggerisci».
- Brani successivi: tocca «Aggiungi» e scrivi titolo e autore. Se hai già scelto la cartella, SendSong propone lo spartito con la scritta «Consigliato». Puoi cambiarlo, scegliere «Nessun PDF» oppure aprire colore e posizione.
- Suggerisci cerca titolo e autore e propone BPM, energia, anno, genere, tonalità (da ReccoBeats, poi modificabile a mano), avviso se il testo è esplicito e la durata originale. Puoi ascoltare 30 secondi da Apple solo se tocchi Ascolta. Serve la rete solo per quella ricerca e per l’anteprima. Niente si scrive da solo: tocca «Applica». Sotto 80 è lento, da 80 a 110 medio, sopra 110 ballabile. Da 140 in su, per pop, ballate e generi lenti, il tempo è contato al doppio: vale la metà (Angels: 150 diventa 75, lento). Dance, rock e rap restano al numero intero. Lo spettacolo funziona anche senza internet.
- Cerca dal campo in alto: filtra per titolo o autore, senza distinguere maiuscole e accenti. Mentre cerchi, il riordino è in pausa.
- Collega il PDF toccando l’icona sulla riga e scegliendo il file della cartella. Se non c’è, «Scegli file…» apre l’esplora file (File, iCloud, Dropbox…). SendSong tiene una copia dentro l’app.
- Cartella, se la vuoi: sotto la ricerca, «Scegli cartella». Dopo la prima volta il pulsante è «Cambia». I PDF di quella cartella si abbinano ai brani per nome del file. Ogni repertorio può avere una cartella diversa. Senza cartella, «Scegli file…» funziona lo stesso.
- Modifica o elimina: tocca il brano. Nella finestra c’è anche «Elimina brano». Se lo togli per sbaglio, tocca «Annulla» nell’avviso in basso.
- Empty list: tap «Add the first song». The setup asks for the name, the PDF folder and confirmation of the chart. The name step also has «Suggest».
- Later songs: tap «Add» and type the title and artist. If you already chose a folder, SendSong suggests the chart with the label «Recommended». You can change it, pick «No PDF» or open colour and position.
- Suggest looks up the title and artist and proposes BPM, energy, year, genre, key (from ReccoBeats, then editable by hand), a warning if lyrics are explicit and the original length. You can play 30 seconds from Apple only if you tap Play. The network is only for that lookup and the preview. Nothing is written on its own: tap «Apply». Under 80 is slow, 80 to 110 is medium, above 110 is danceable. From 140 up, for pop, ballads and slower genres, the tempo is counted double: the half is used (Angels: 150 becomes 75, slow). Dance, rock and rap keep the full number. The show still works offline.
- Search from the field at the top: it filters by title or artist, ignoring case and accents. Reordering pauses while you search.
- Link the PDF by tapping the icon on the row and picking the file from the folder. If it is not there, «Choose file…» opens the file browser (Files, iCloud, Dropbox…). SendSong keeps a copy inside the app.
- A folder, if you want one: below search, «Choose folder». After the first time the button is «Change». PDFs in that folder match songs by filename. Each repertoire can have a different folder. Without a folder, «Choose file…» still works.
- Edit or delete: tap the song. The window also has «Delete song». If you remove one by mistake, tap «Undo» in the notice at the bottom.
Con il piano gratis restano utilizzabili i primi 5 brani del repertorio attivo. Gli altri restano in lista, con il lucchetto, finché non passi a Pro o Full. Dal menu (⋮) sulla home, «Solo brani senza PDF» mostra solo i titoli ancora senza spartito.
On the free plan the first 5 songs of the active repertoire stay usable. The others stay in the list, locked, until you move to Pro or Full. From the (⋮) menu on the home screen, «Songs without PDF only» shows only titles that still have no chart.
Spartito o testo, ognuno il suoChart or lyrics, each their own
Ogni dispositivo tiene il proprio PDF. Sul Master alleghi al brano lo spartito o il testo: dall’icona sulla riga, con «Scegli file…», o dalla cartella se il file ha il nome del brano. Sul Monitor importi un file diverso, anche quello spartito o testo. Un doppio tocco sul Master apre il suo PDF. Il Monitor mostra il suo quando scegli «Spartito» al posto di «Titoli».
Each device keeps its own PDF. On the Master you attach the chart or the lyrics to the song: from the icon on the row, with «Choose file…», or from the folder when the file is named like the song. On the Monitor you import a different file, a chart or lyrics as well. A double tap on the Master opens its PDF. The Monitor shows its own when you pick «Sheet» instead of «Titles».
I PDF del leggìo stanno sul Monitor, in una libreria locale. Titoli, brano attuale, prossimo e scaletta sono sempre gratis. Gli spartiti sono gratis fino a 5 file, pedale e inversione colori compresi. Dal sesto in poi il file resta in libreria ma non si apre, finché sul Monitor non hai PDF Monitor o Full. L’acquisto si fa su quel dispositivo, in Impostazioni › Piano. Il Pro del Master non sblocca da solo gli spartiti illimitati del leggìo.
The stand’s PDFs live on the Monitor, in a local library. Titles, the current song, the next one and the setlist are always free. Charts are free for up to 5 files, pedal and colour invert included. From the sixth on, the file stays in the library but does not open, until that Monitor has PDF Monitor or Full. Buy it on that device, under Settings › Plan. The Master’s Pro plan does not by itself unlock unlimited charts on the stand.
- Importa da Impostazioni › Monitor oppure dalla gestione spartiti. Il PDF copiato resta sul Monitor anche se sposti l’originale.
- Cartella collegata, se vuoi i suggerimenti automatici. In Spartiti PDF o in Impostazioni › Monitor tocca «Collega cartella». Quando il Master invia un brano, SendSong propone il file più simile: confermi o rifiuti dal banner. Alla conferma il PDF entra nella libreria locale. Cartella e annotazioni, oltre i 5 PDF gratis, richiedono PDF Monitor o Full.
- Volta pagina toccando i lati (circa il 35% dello schermo a sinistra e a destra). Al centro, con lo zoom normale, il tocco non gira foglio: puoi indicare una battuta. Pizzica per ingrandire.
- Pedale. Con il PDF aperto e l’app in primo piano, SendSong legge frecce, Page Up, Page Down, Spazio e Invio. Collega il pedale prima di aprire lo spartito. Il pedale di pagina non è l’adattatore degli Effetti MIDI: quello sta sul Master e manda CC al processore.
- Inverti colori dal menu dello spartito: la voce è «Inverti colori». Utile al buio. La barra in basso resta visibile con titolo, prossimo brano e pagina corrente.
- Annota, in alto a destra. Compare una barra orizzontale: penna, evidenziatore, colori, annulla, gomma e le cancellazioni che chiedono conferma. «Fine» torna a zoom e scorrimento. I segni restano solo su questo Monitor.
- Import from Settings › Monitor or from sheet management. The copied PDF stays on the Monitor even if you move the original.
- A linked folder, if you want automatic suggestions. In Sheet music PDFs or under Settings › Monitor tap «Link folder». When the Master sends a song, SendSong offers the closest file: confirm or dismiss it from the banner. On confirm the PDF enters the local library. A folder and annotations, past the 5 free PDFs, need PDF Monitor or Full.
- Turn the page by tapping the sides (about 35% of the screen on the left and on the right). In the centre, at normal zoom, a tap does not change sheet: you can point at a bar. Pinch to zoom.
- Pedal. With the PDF open and the app in the foreground, SendSong reads arrow keys, Page Up, Page Down, Space and Enter. Connect the pedal before opening the chart. The page pedal is not the MIDI effects adapter: that one lives on the Master and sends CC to the processor.
- Invert colours from the chart menu: the row is «Invert colors». Useful in the dark. The bottom bar stays visible with the title, the next song and the current page.
- Annotate, at the top right. A horizontal bar appears: pen, highlighter, colours, undo, eraser and clears that ask you to confirm. «Done» returns to zoom and scrolling. Marks stay only on this Monitor.
«Annota», in alto a destra sul PDF aperto, c’è sul Master e sul Monitor. Penna, evidenziatore, colori e gomma restano sul dispositivo che li ha usati. Sul Monitor le annotazioni, insieme alla cartella e ai PDF oltre i 5 gratis, richiedono PDF Monitor o Full. Sul Master «Annota» è disponibile sul PDF del brano. «Effetti», in basso a sinistra sul Master, è il pannello MIDI: non modifica i segni.
«Annotate», at the top right of the open PDF, is on the Master and on the Monitor. Pen, highlighter, colours and eraser stay on the device that used them. On the Monitor, annotations, together with the linked folder and PDFs past the 5 free ones, need PDF Monitor or Full. On the Master, «Annotate» is available on the song’s PDF. «FX», at the bottom left on the Master, is the MIDI panel: it leaves the marks as they are.
Monitor chiaro / scuroLight / dark Monitor
Sul Monitor, nella barra in alto, il pulsante sole o luna cambia il palco. Il suggerimento del pulsante è «Tema chiaro» oppure «Tema scuro». Scegli quello che si legge meglio con le luci del locale: scuro sul palco buio, chiaro se lo schermo è in piena luce.
On the Monitor, in the top bar, the sun or moon button changes the stage. The button’s tip reads «Light theme» or «Dark theme». Pick whichever reads better under the venue lights: dark on a dim stage, light if the screen is in full light.
Impostazioni › Aspetto, con «Chiaro» e «Scuro», cambia solo le schermate del Master e delle impostazioni. Il Monitor non segue quel tema: resta quello del pulsante sole o luna.
Settings › Appearance, with «Light» and «Dark», changes only the Master screens and settings. The Monitor does not follow that theme: it stays on whatever the sun or moon button last set.

Backup e ripristinoBackup and restore
Il backup è una copia sul dispositivo di brani, playlist e collegamenti ai PDF. Non viene caricato su un server.
A backup is a copy on the device of songs, playlists and PDF links. It is not uploaded to a server.
- Apri Impostazioni › Backup. Vedi la data dell’ultimo e l’elenco di quelli già salvati.
- Tocca «Crea backup» per farne uno adesso. L’app ne crea anche uno da sola ogni tanto. Un altro nasce da solo quando, ricevendo un repertorio, scegli «Sostituisci attivo».
- Per tornare indietro tocca «Ripristina» accanto al backup e conferma.
- Open Settings › Backup. You see the date of the last one and the list of those already saved.
- Tap «Create backup» to make one now. The app also makes one on its own from time to time. Another is created on its own when, while receiving a repertoire, you choose «Replace active».
- To go back, tap «Restore» next to the backup and confirm.
Sul piano gratis il ripristino tiene utilizzabili i primi 5 brani. L’app lo dice con «Ripristinati solo i primi 5 brani. Passa a Pro per usarli tutti.» Gli altri restano nel backup. Il backup non sposta i file PDF da un telefono all’altro: ricollega gli spartiti se i nomi dei file coincidono con la cartella che hai scelto.
On the free plan a restore keeps the first 5 songs usable. The app says so with «Only the first 5 songs were restored. Upgrade to Pro to use them all.» The others stay in the backup. The backup does not move PDF files from one phone to another: it relinks charts when the filenames match the folder you chose.
RepertoriRepertoires
Un repertorio è una libreria a sé: i suoi brani, le sue playlist salvate e la sua cartella PDF. Con il piano gratis ne hai uno, con fino a 5 brani attivi. Con Pro o Full puoi crearne quanti ne servono. Quello che avevi già all’aggiornamento si chiama «Il mio repertorio». Se il piano scade, i dati restano sul dispositivo e resta utilizzabile il repertorio attivo.
A repertoire is its own library: its songs, its saved playlists and its PDF folder. On the free plan you have one, with up to 5 active songs. With Pro or Full you can create as many as you need. What you already had at the update is called «My repertoire». If the plan lapses, the data stays on the device and the active repertoire stays usable.
Cambiare e gestireSwitch and manage
- Chip in cima alla lista sul Master: tocca il nome del repertorio attivo e scegline un altro. Se hai modifiche aperte, l’app dice «Salva o annulla le modifiche prima di cambiare repertorio».
- Chip at the top of the list on the Master: tap the active repertoire’s name and pick another. If edits are open, the app says «Save or discard your changes before switching repertoire».
- Impostazioni › PDF › Gestisci repertori: crea, rinomina, elimina o imposta quale usare. Sul piano gratis non puoi aggiungerne un secondo.
- Settings › PDF › Manage repertoires: create, rename, delete or set which one to use. On the free plan you cannot add a second one.
Invia repertorioSend repertoire
Serve a portare la stessa libreria su un secondo Master, per esempio dal telefono al tablet. I due dispositivi devono usare la stessa connessione, Wi‑Fi locale o Bluetooth.
Use it to take the same library to a second Master, for example from the phone to the tablet. The two devices must use the same connection, local Wi‑Fi or Bluetooth.
- Sul Master che ha il repertorio apri il menu (⋮) oppure Impostazioni › PDF › Invia repertorio. Durante l’attesa, «Annulla» ferma collegamento o trasferimento.
- Sull’altro Master scegli cosa farne.
- On the Master that has the repertoire open the menu (⋮) or Settings › PDF › Send repertoire. While you wait, «Cancel» stops the connection or the transfer.
- On the other Master choose what to do with it.
- Nuovo repertorio lo aggiunge come repertorio separato e lo apre. Sul piano gratis la voce è «Nuovo repertorio (piano Master)» e non puoi crearne un secondo.
- New repertoire adds it as a separate repertoire and opens it. On the free plan the row is «New repertoire (Master plan)» and you cannot create a second one.
- Unisci aggiunge solo i brani che mancano in quello attivo.
- Merge adds only the songs missing from the active one.
- Sostituisci attivo rimpiazza quello attivo, dopo «Conferma sostituzione». Prima SendSong crea un backup locale, che ritrovi in Impostazioni › Backup.
- Replace active replaces the active one, after «Confirm replace». SendSong creates a local backup first, which you can find under Settings › Backup.
- Annulla non scrive nulla.
- Cancel writes nothing.
Sul piano gratis l’import si ferma a 5 brani. I file PDF non viaggiano nell’invio. Se entrambi i dispositivi puntano alla stessa cartella, per esempio Dropbox, SendSong ricollega gli spartiti per nome del file.
On the free plan the import stops at 5 songs. PDF files are not sent. If both devices point at the same folder, for example Dropbox, SendSong relinks the charts by filename.
Effetti MIDI (solo Master)MIDI effects (Master only)
Dal Master puoi accendere e spegnere effetti su un processore che accetta Control Change (CC), via Bluetooth MIDI. Il caso tipico è un TC‑Helicon VoiceLive 3 Extreme con un adattatore BLE sul DIN MIDI IN del processore (Yamaha MD‑BT01, CME WIDI Master). Un device con BLE MIDI integrato si collega senza adattatore. Non sono supportati Bluetooth audio, USB MIDI e un cavo DIN senza adattatore BLE. Il Bluetooth con cui il Master parla ai Monitor è un collegamento diverso da quello degli effetti.
From the Master you can turn effects on and off on a processor that accepts Control Change (CC), over Bluetooth MIDI. The typical case is a TC‑Helicon VoiceLive 3 Extreme with a BLE adapter on the processor’s DIN MIDI IN (Yamaha MD‑BT01, CME WIDI Master). A device with built-in BLE MIDI connects without an adapter. Bluetooth audio, USB MIDI and a DIN cable without a BLE adapter are not supported. The Bluetooth link the Master uses for Monitors is a different connection from the effects link.
Attivazione e pianoEnable and plan
Apri Impostazioni › MIDI e accendi l’interruttore Effetti MIDI. Da spento, che è il default, non compaiono né il pannello né la scansione degli effettori. La funzione è inclusa in Pro e Full, anche Full per sempre e anche durante la prova di 14 giorni. Sul piano gratis resta spenta. Un dispositivo usato solo come Monitor non ha questa sezione.
Open Settings › MIDI and turn on the MIDI effects switch. While it is off, which is the default, neither the panel nor the scan for effects gear appears. The feature is included in Pro and Full, including Full for life and the 14-day trial. It stays off on the free plan. A device used only as Monitor does not have this section.
Con l’interruttore acceso, il pulsante «Effetti» compare in basso a sinistra, sulla lista brani e anche sullo spartito. Il pannello si apre come scheda ancorata al pulsante. «Annota», sullo spartito, resta in alto a destra e non c’entra con il MIDI.
With the switch on, the «FX» button appears at the bottom left, on the song list and on the chart. The panel opens as a card anchored to the button. «Annotate», on the chart, stays at the top right and is not part of MIDI.
Collegare adapter e deviceConnect adapters and gear
- Accendi l’adattatore BLE, o il device con BLE MIDI, e tienilo vicino al Master. Il cavo DIN entra nel MIDI IN del processore, non nel MIDI OUT.
- Con Effetti MIDI attivo, apri il pannello e tocca «Aggiungi dispositivo». La finestra chiede che device vuoi: VoiceLive 3 Extreme porta già i pulsanti di fabbrica; Generico parte vuoto.
- Collegalo dall’elenco Bluetooth e conferma. Se l’elenco è vuoto: adattatore acceso e vicino, interruttore acceso, permesso Bluetooth concesso e, su Android se il sistema lo chiede, dispositivi nelle vicinanze.
- Imposta il canale MIDI (1–16) uguale al canale di ricezione sul processore. Più processori possono condividere lo stesso adattatore tramite MIDI THRU, ciascuno sul proprio canale.
- Power on the BLE adapter, or the device with BLE MIDI, and keep it near the Master. The DIN cable goes into the processor’s MIDI IN, not MIDI OUT.
- With MIDI effects on, open the panel and tap «Add device». The window asks which device you want: VoiceLive 3 Extreme already brings the factory buttons; Generic starts empty.
- Connect it from the Bluetooth list and confirm. If the list is empty: adapter on and nearby, switch on, Bluetooth permission granted and, on Android if the system asks, nearby devices.
- Set the MIDI channel (1–16) to the processor’s receive channel. Several processors can share the same adapter through MIDI THRU, each on its own channel.
Pulsanti e templateButtons and templates
VoiceLive 3 Extreme include i CC di fabbrica: Harmony, Reverb, Delay, Double, HardTune, μMod, Transducer, Hit, All Off, Tap. Generico parte vuoto: dai un nome, un numero CC da 0 a 127 e scegli «Acceso/spento» o «Impulso». «Impara» legge il CC dal device e allinea anche il canale al primo messaggio che arriva.
VoiceLive 3 Extreme ships with the factory CCs: Harmony, Reverb, Delay, Double, HardTune, μMod, Transducer, Hit, All Off, Tap. Generic starts empty: give it a name, a CC number from 0 to 127 and pick «On/off» or «Momentary». «Learn» reads the CC from the device and also aligns the channel to the first message that arrives.
Se il pulsante non cambia l’effettoIf a button does not change the effect
- Il canale nell’app è lo stesso canale di ricezione sul processore.
- The channel in the app is the same receive channel on the processor.
- Il cavo è nel MIDI IN del processore.
- The cable is in the processor’s MIDI IN.
- Con Generico, «Impara» mentre premi il pulsante sul processore, così il CC è quello giusto.
- With Generic, use «Learn» while you press the button on the processor, so the CC is the right one.
- Sul palco tieni accesi solo gli adattatori che ti servono: il collegamento ai Monitor e quello agli effetti usano il Bluetooth in modo separato.
- On stage keep only the adapters you need powered on: the link to the Monitors and the link to the effects use Bluetooth separately.
L’add-on Effetti MIDI non è più in vendita: è incluso in Pro e Full. Se l’avevi già comprato, «Ripristina acquisti» sul Master lo riconosce ancora.
The MIDI effects add-on is no longer for sale: it is included in Pro and Full. If you already bought it, «Restore purchases» on the Master still recognises it.
Piani e acquistiPlans and purchases
Apri Impostazioni › Piano per vedere il livello attuale e per acquistare. Prezzi e rinnovi li mostra lo store, non SendSong. Se i prezzi non compaiono, l’app dice che non riesce a leggerli e il pulsante di acquisto resta fermo: controlla la connessione e l’account dello store, poi tocca «Riprova».
Open Settings › Plan to see the current tier and to buy. The store shows prices and renewals, not SendSong. If prices do not appear, the app says it cannot read them and the buy button stays still: check the connection and the store account, then tap «Retry».
- Gratis. Sul Master: 1 repertorio, 5 brani attivi, 1 Monitor collegato, Effetti MIDI spenti. Sul Monitor: titoli e scaletta sempre, e fino a 5 PDF.
- Free. On the Master: 1 repertoire, 5 active songs, 1 linked Monitor, MIDI effects off. On the Monitor: titles and setlist always, and up to 5 PDFs.
- PDF Monitor. Sul dispositivo usato come Monitor: spartiti senza limite e annotazioni.
- PDF Monitor. On the device used as Monitor: charts with no cap and annotations.
- Pro. Sul Master: brani e Monitor collegati senza limite, più repertori, Effetti MIDI inclusi.
- Pro. On the Master: songs and linked Monitors with no cap, more repertoires, MIDI effects included.
- Full. Pro sul Master e PDF Monitor insieme. «Full per sempre» è lo stesso sblocco, pagato una volta, senza abbonamento e senza rinnovi.
- Full. Pro on the Master and PDF Monitor together. «Full for life» is the same unlock, paid once, with no subscription and no renewals.
- Prova Pro. 14 giorni la prima volta che apri SendSong come Master, su quel dispositivo, senza account e senza carta. Alla fine torni al gratis: restano utilizzabili 5 brani, 1 repertorio e 1 Monitor. La prova non sblocca da sola i PDF illimitati sul Monitor.
- Pro trial. 14 days the first time you open SendSong as Master, on that device, with no account and no card. When it ends you return to free: 5 songs, 1 repertoire and 1 Monitor stay usable. The trial does not by itself unlock unlimited PDFs on the Monitor.
Se hai comprato Full per sempre, in Impostazioni › Piano compare il badge «Full per sempre» e, al posto di un nuovo acquisto, «Hai Full per sempre». Gli altri piani risultano già inclusi.
If you bought Full for life, Settings › Plan shows the «Full for life» badge and, instead of a new purchase, «You have Full for life». The other plans show as already included.
Su un telefono nuovo, o dopo una reinstallazione, apri Impostazioni › Piano › Dettagli e ripristino acquisti e tocca «Ripristina acquisti», con lo stesso Apple ID o account Google. Su iPhone conferma l’Apple ID e leggi l’avviso: acquisti ripristinati, oppure nessuno per questo account. «Gestisci abbonamento» apre lo store. Un piano comprato su Apple non vale su Android, e il contrario. I brani non viaggiano con l’acquisto: restano sul dispositivo.
On a new phone, or after a reinstall, open Settings › Plan › Details and restore purchases and tap «Restore purchases», with the same Apple ID or Google account. On iPhone confirm the Apple ID and read the notice: purchases restored, or none for this account. «Manage subscription» opens the store. A plan bought on Apple does not apply on Android, or the reverse. Songs do not travel with the purchase: they stay on the device.
Risoluzione problemiTroubleshooting
«Ricerca del Master…» vuol dire che il Monitor è acceso ma non trova quel Master. Controlla nell’ordine, poi riprova.
«Looking for the Master…» means the Monitor is on but cannot find that Master. Check in this order, then try again.
- Lo stesso trasporto in Impostazioni › Connessione su entrambi.
- Bluetooth acceso, se usate Bluetooth. Su iOS consenti Rete locale e Bluetooth. Su Android, se il sistema lo chiede, i dispositivi nelle vicinanze (e la posizione solo se serve alla scansione BLE).
- Se usate il Wi‑Fi: la stessa rete, non una rete ospite che isola i telefoni.
- L’app in primo piano, il Master acceso e vicino, e un codice di 6 cifre uguale a quello attuale. Se hai generato un codice nuovo, il precedente non vale più.
- Se compare «Il Master ha raggiunto il limite di Monitor», sul gratis c’è già un Monitor collegato. Serve Pro o Full per un altro leggìo.
- The same transport under Settings › Connection on both.
- Bluetooth on, if you use Bluetooth. On iOS allow Local Network and Bluetooth. On Android, if the system asks, nearby devices (and location only if the BLE scan needs it).
- If you use Wi‑Fi: the same network, not a guest network that isolates the phones.
- The app in the foreground, the Master on and nearby, and a 6-digit code that matches the current one. If you generated a new code, the previous one no longer works.
- If you see «The Master reached its monitor limit», on the free plan a Monitor is already linked. You need Pro or Full for another stand.
Per una domanda precisa (PIN, pedale, annotazioni, backup, add-on MIDI) apri il supporto: le risposte si cercano dall’alto. Se non la trovi, scrivi a info@ritmodigitale.it con modello del dispositivo, versione del sistema, versione di SendSong (in fondo a Impostazioni › Account), ruolo, trasporto e che cosa succede passo passo.
For a specific question (PIN, pedal, annotations, backup, MIDI add-on) open support: the answers are searchable from the top. If you cannot find it, write to info@ritmodigitale.it with the device model, OS version, SendSong version (at the bottom of Settings › Account), role, transport and what happens step by step.